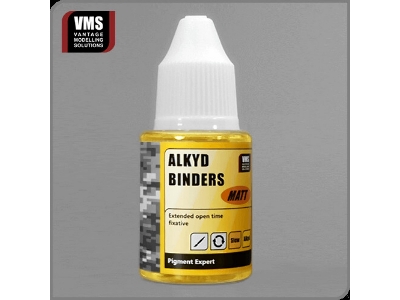
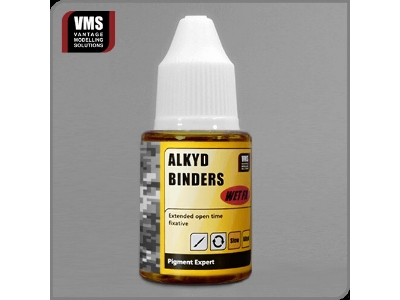
The most versatile weathering product ever created! Fix pigments using any method including capillary action, make custom weathering liquids, prepare weathering pastes. Dry to touch upon solvent evaporation, formulated for speedy modellers. Reversible. Product comes in 2 variants: "standard" for matte effects and "Wet FX" for gloss effects.
Can be used over any acrylic base and enamel bases by the following companies: Humbrol®, Revell®, Model Master®. IMPORTANT: Tamiya® enamel base coats are incompatible!
ENML 2.0 binders are dry to touch the moment you evaporate the solvent. Once the solvent is gone (it takes about 20 sec. with a hair dryer) your pigment layer is ready! ENML 2.0 binders are based on medium evaporation rate solvent meaning they won't dry up on you in the middle of the process. You decide when the work is done by applying heat which freezes the pigment in place or just leaving the model to dry by it's own.
Add or remove pigments at your leisure!
Many, especially young modelling artists are reluctant to weathering as classic enamel products are irreversible once cured. You fix your pigment badly and that's that! With VMS ENML 2.0 binders weathering is never a done deal! Although ENML 2.0 binders cure in a matter of seconds just as your typical enamel would but better - they can be completely reversed at any time! Now you can go crazy with your model and remove the pigment job if you don't like it and better use the reversibility to your advantage and create numerous SFX. With these flexible binders sky is the limit!
Create custom weathering liquids and pastes!
VMS ENML 2.0 aren't just simple pigment fixers, they are devised to work as fully fledged weathering liquid/paste binders with appropriate flow and viscosity. Now YOU decide the colour, flow, opacity and texture - every aspect of a weathering liquid. Benefit from rapid action and reversibility while exercising your favourite techniques!
Simply mix your pigments with ENML 2.0 binders and a fresh batch of weathering liquid or pase is ready!
FAQ
What agent do I need to reverse pigment jobs created with ENML 2.0?
You may use either VMS Universal weathering carrier "standard" or "light" type. "Standard" carrier type works faster but can be used only over acrylic base coats. "Light" type works a bit slower but can be used over both enamel and acrylic base coats. Please check out Universal weathering carrier product FAQ to learn more.
How to produce even coverage effect?
“Even coverage” is a starting point for many other techniques + it imitates fine dry mud very well on it's own. Give it a try to familiarise yourself with VMS binders and step up to more advanced techniques. Mix your pigment with ENML 2.0 binders “standard” type. Apply resulting weathering liquid with a brush as if painting. One dry you can dust raw pigment on top of the layer for lighter shade (even coverage + dusting on top). You can use hair dryer to expedite things.
How do I create my own weathering liquid?
Mix your spot-on pigments or equivalent (low quality pigments produce bad weathering liquids which spread badly) with the ENML 2.0 binders "standard" type in a jar or tray. Basic mixing ratio is 1:1 but you can add more pigments for stronger liquid with better coverage capability. By changing the pigment amount you can adjust the liquid to your needs and style!
How to create pigment wash and do partial removal?
Procedure is as for even coverage. Apply a layer of pigment using ENML 2.0 binders “standard” type. Use hair dryer. Once a layer is dry use UNIVERSAL weathering carrier to liquefy it again and remove portions of pigment. Remove as much pigment as you need leaving it in places you deem appropriate. Doing it this way, using binders first, introducing carrier (thinner) later ensures your pigment job is permanent, classic washes with just the thinner are not durable.
How to create dry mud accumulation?
Mix your textured pigments with ENML 2.0 binders "standard" type. Apply the resulting paste with a brush and use hair dryer to get rid of the solvent freezing the job in place. ENML 2.0 cures quickly but can be reversed at any time. This means you can come back with a precision brush soaked with Universal weathering carrier later and correct the job. Alternatively you may exercise classic capillary technique as described below.
How and when to fix my pigments using capillary action?
You will want to take advantage of capillary action whenever you want to produce accumulated mud or dirt. This technique benefits greatly from using textured pigments. To make things more effective start by applying a thin layer of ENML 2.0 binders "standard" wherever you want the pigment job to appear. Next sprinkle textured pigments over the wet binders layer so that they stick to it. Now is the time for the proper capillary action technique. Dispense some binder into a tray and dip a precision brush in it. Apply drops of binders directly over the pigments you sprinkled earlier, allow the drops to slide from the bristle and penetrate the pigment structures. You can sprinkle more pigment any time during this process. When you are done you can apply heat to get rid of the solvent. Pigments will regain original colours within a few hours once the rest of the solvent is gone.
How to create wet effects? (coloured i.e. with use of pigments, high gloss finish on road wheels and suspension)
Mix your pigments with VMS ENML 2.0 "Wet FX" type binders. Apply the resulting paste (textured pigments) or liquid (zero tex pigments). Use hair dryer to get rid of the solvent. The pigment job will turn matt as the pigments absorb the binders the first time you mix and apply them. Don't worry about the matt finish it's supposed to work this way. Let the pigment job breathe for about 1h for a better sealed and more durable layer. Next step is to apply a thin coat of ENML 2.0 binders "Wet FX" over the pigment job you just created in order to enhance the gloss. You can add multiple layers for a "dripping wet" effect. Use hair dryer between the coats for quicker results. You can apply "Wet FX" all over or just locally for more variation.
How to create point wet (wet accent) effects?
For damp (satin finish ) point effect use ENML 2.0 “Wet FX”. Simply apply the binders with a precision brush wherever you need them. For more glossy wet effects please use ENML 2.0 “Wet FX” binders.
What are low and high opacity wet glazes and how to create them?
Wet glazes are glossy fluids with low to moderate pigment percentage. Contrarily to gloss paints glazes offer a certain amount of transparency so as to show underlying coats. This means more authentic and better looking results. To prepare a low opacity glaze with mix a tiny bit (5%) of pigment with ENML 2.0 “Wet FX” type binder and then spread it evenly over the target part. To create high opacity glaze mix a bit more pigment (10-15% depending ho much opacity is your goal – more pigment equals higher coverage) with ENML 2.0 “Wet FX” type binders and spread a thin layer over the target part. While making glazes always use minimal pigment amounts to retain gloss! If you overdose pigments and glazes turn matt you can always apply a thin coat of pure binders over to increase gloss, but best glazes are just one layer.
How to create partial wet glaze effect?
Follow the glaze procedure as described above to create low or high opacity glaze first. To remove the gloss where needed use Universal weathering carrier, use damp brush to wipe excessive binders, use hair dryer to check the result. If still too glossy do some more wiping, you may introduce a bit pigment along with the carrier to reduce gloss better. To create a smooth transition from gloss to matt, allow the carrier to flow freely between the both areas, soak it up with your brush (without wiping) and finally use hair dryer to check out the result.
What do you mean by maximising dusting results and how do I do that?
Dusting is the basic way of working with pigments. You simply rub pigments with the brush wherever you want it to appear. It involves no binders. It often happens that you want the dusted pigments to have higher opacity and better coverage but their capabilities are limited as there are no binders involved. For instance you want to model a vehicle that has been rolling in the deserts. You dust some pigment over the wheels and hull but the base coat is still showing too much, the coverage is poor, raw pigment is not enough. To remedy that you need to mix your pigments with the ENML 2.0 binders "standard" type and apply resulting weathering liquid with a brush - just paint the target area with pigments for what we call "even coverage". Apply heat so that the solvent is gone. Next do the dusting over this pigment coat - you will be amazed by how good and homogeneous the coverage is. Such pigment job will have maximum opacity and vibrancy. We refer to it as "even coverage + dusting on top" - check out the capability round-up.
How to create streaking on my vehicle's hull?
Mix your pigment with ENML 2.0 "standard" type binders. Apply the resulting weathering liquid wherever you want the streaking to appear. No finesse is needed here, simply paint some irregular dot-like shapes here and there they will disappear later on - don't sweat it. Apply heat using hair dryer until this initial pigment job is dry. Now soak a soft flat brush* with Universal weathering carrier, touch it to a piece of paper to remove the excessive carrier (brush needs to be damp not dripping wet) and then swipe it over the pigment job you just did using vertical brushstrokes - observe how easily cool streaking lines are appearing. Move from bottom to top of the vehicle and the other way round. Keep swiping until you remove as much pigment as you need. You can end up with heavy streaking, barely visible effect or no streaking at all if you change your mind. Rinse the brush with Universal weathering carrier frequently so that it collects the pigments better. Remember to use damp, not dripping wet brush.
How to create light spatter on my vehicle's hull? (matt finish)
Mix your pigment with ENML 2.0 "standard" type binders so as to produce weathering liquid, mix the liquid well so that there are no clumps unless you are going for heavy, textured spatter. Spatter is best created using a flat brush*. Dip the brush in weathering liquid and then touch it to a piece of paper to remove the excessive liquid. Press the bristles of the brush with your finger and move it in a backward direction so that the liquid gets sprayed. The procedure is similar to simple toothbrush spraying technique. Do test spraying on a sheet of paper to get the hang of it and adjust spatter size and density. With this technique you can produce light, heavy and thick spatter alike. As with all ENML 2.0 pigment jobs you can completely or partially reverse the results if need be.
How to create heavy spatter on my vehicle's hull? (matt finish)
Procedure is similar to the one for light spatter described above. It's best to do some actual light spatter first and then follow up with heavy. After creating light spatter add some textured pigments to your existing weathering liquid or make a new batch with textured pigments. Apply this gritty mixture the same way as before (toothbrush spraying technique) over the lighter spatter to produce the accumulation. Apply the grit over the lower parts of your AFV and leave the upper parts with just the light spatter. If there are any unwanted clumps of pigments on the model simply use precision brush to “pick” them up.
How to create heavy spatter on my vehicle's hull? (wet finish)
Apply standard (matt) heavy spatter first as described above. Wait for it to dry for several hours so that the coat has better durability. Next mix a tiny bit of the pigments you used for the initial matt finish spatter with ENML 2.0 binders “Wet FX” type. Tiny is the key word here, 5% of pigment in the mix is enough so that the gloss is retained. Apply this thick mixture over the matt spatter to enhance the finish and make it glossy. Use gentle taping motion while applying this glossy layer so that you don't disturb the original layer. The mixture will level and allow the original texture to show as it dries. If after 2h the gloss is fine you are done. If not apply another coat of ENML 2.0 binders “Wet FX” type this time don't use pigments, raw binder will do the trick.
Which binder to use to produce cool wet effects on hull? (pure binders without pigments)
Go with ENML 2.0 “Wet FX” binder type. It has optimal thickness, flow and levelling capabilities. Binder can be easily spread, will dry to a thin film and can be removed or modified anytime using Universal weathering carrier.
What techniques do you recommend to create wet effects on hull?
To create water residue or spilled fuel imitations apply the binders where you need them with a precision brush. Excessive or unnaturally looking binders can be removed or adjusted using Universal weathering carrier. Use the carrier to create soft transitions from wet to dry surfaces. To create streaking water imitation apply dots of binder atop the vehicle and swipe them down with flat brush* like you do while creating streaking, you don't need to dampen the brush with carrier – this way you will end up with sharp contours on your streaking. Another cool technique is rain marks, dip your flat brush* in the binder, wipe the excess and create spatter using toothbrush spraying technique. To create dispersed wet accents apply ENML 2.0 binders with precision brush first. To create actual dispersion (lack of sharp contours and natural blending of a wet effect with it's surroundings) use Universal weathering carrier. Apply it all over the place so that the binders can disperse over the area. Use your brush to spread and move the binders until you have them just where intended.
How can binders aid me while filtering?
While filtering your goal is to change the shade of the base colour. For instance you may want to indicate that your AFV was rolling on a dusty road and make the base coat reflect that. You may want to create some fading using white, or darken the base to show the vehicle was extensively used, possibilities are endless. VMS Spot-on pigments are great for filtering as they are very fine and adhere very well on their own. When you couple them with ENML 2.0 binders you can easily create your own filtering fluids on the spot. To filter your model with pigments you first need to create standard weathering fluid as described above. Apply it here and there on the model. Next step is to swipe over the target area with your flat brush* soaked with Universal weathering carrier so as to spread the pigments evenly over the surface. Continue swiping until you are happy with the result i.e. most pigments are gone and the area gets the intended change of colour.
My weathering liquid is not deep matt when it dries, it's glistening here and there.
This rarely happens but when it does simply add more pigments to the mix – the gloss will disappear.
What's the best way to clean my brushes after working with ENML 2.0?
For regular clean up - between the jobs, Universal weathering carrier will suffice. Just have some carrier ready, rinse the brushes and wipe clean using a paper towel or a cloth. For proper deep cleaning please use VMS Airbrush Cleaners Pro ENML type (label with blue ENML icon) which have maximum potency and will keep your brushes in top condition by freeing them of pigments and binders that accumulate at the base of the bristle. Brushes that are not deep cleaned regularly deteriorate faster overtime.
What's the difference between nylon and red sable brushes?
Synthetic nylon brushes are inexpensive but don't last as long as natural red sable ones. It's worth to invest in a red sable - they are cleaned far more easily, are softer and last forever if deep cleaned regularly.
*flat brush: 1 cm wide bristle, size 10+, we recommend red sable but nylon equivalent will do
Product Details
VMS PE02S
2024-04-01
Data sheet
Capacity [ml]
30
Availability
From stock
Shipping time
3 days
Assortment / material
n/a
No carriers available for this product.
The above shipping costs are for 1 item only.
You will see the final shipping costs when you place your order.


@COMMENT_TITLE@
@COMMENT_COMMENT@